Tuesday, February 18, 2014

Acquisitions, Organization, and Future Plans...

So I haven't been updating this blog o'mine nearly as often as I should have, but there is a good reason for this... I haven't been sewing nearly as often as usual and thus had nothing write about. I chalk this up to post-holiday laziness and general malaise.  Of course it could also be that I'm busy admiring views like this:
 
 
That said, I did acquire some amazing new stuff to help in some upcoming projects.

Most crucially, I upgraded my iron with a nice new Rowenta.  This is not to say that the Hamilton Beach iron I inherited from my mother circa 1980-something is not perfectly lovely... frankly it's stood me in pretty good stead, but it was time for an upgrade and some Amazon vouchers for Christmas proved the ideal opportunity to get a great iron for far less than I would otherwise have paid. 

 
Isn't that pretty and shiny?  Particularly when compared to my previous equipment?
 
 
And I am pleased to report that my new iron is not only visually pleasing, and not covered in burnt crispy...stuff, but it also works far better.  Observe:


These two irons were on the same setting (upper mid-range heat recommended for wool with the steam on).  Just look at the difference!  The new iron created such nice crisp results, comparatively.  The lesson that I've learned once again?  Upgrading to better (sadly this often means more expensive) equipment is pretty much always worth the investment.
 
I also have acquired an interesting new pattern and some useful books. 
 
Over the summer, my younger sister was involved in field study in Mongolia and on her way back she stopped off in Japan where she picked up a pattern for her sewing obsessed sister.  Now part of me is deeply tempted to make myself an amazing new kimono, but the larger part of me doesn't want to risk cutting up a pattern in a foreign language I can't even read.  We'll just have to see what happens.


I also bought myself Patterns of Fashion 2.  As someone interested in costuming and historical clothing, I eventually plan on buying more from this series, but I started with the edition which focuses on my favorite era: 1860-1920.  This amazing book(s) diagrams and provides scaled patterns for period gowns from various museum collections. 
 
 
I also bought Bridal Couture by couturier Susan Khalje.  This book outlines the fabrication, construction, and application to design and build wedding gowns and formals.  The book details topics such as working with lace and constructing boned bodices.  It's fantastic.  And why did I buy this book you may ask?  Because I have offered to make bridesmaid dresses for my baby sister's wedding set for May of 2015.  It's really the least I can do as one of the co-maids-of-honor.


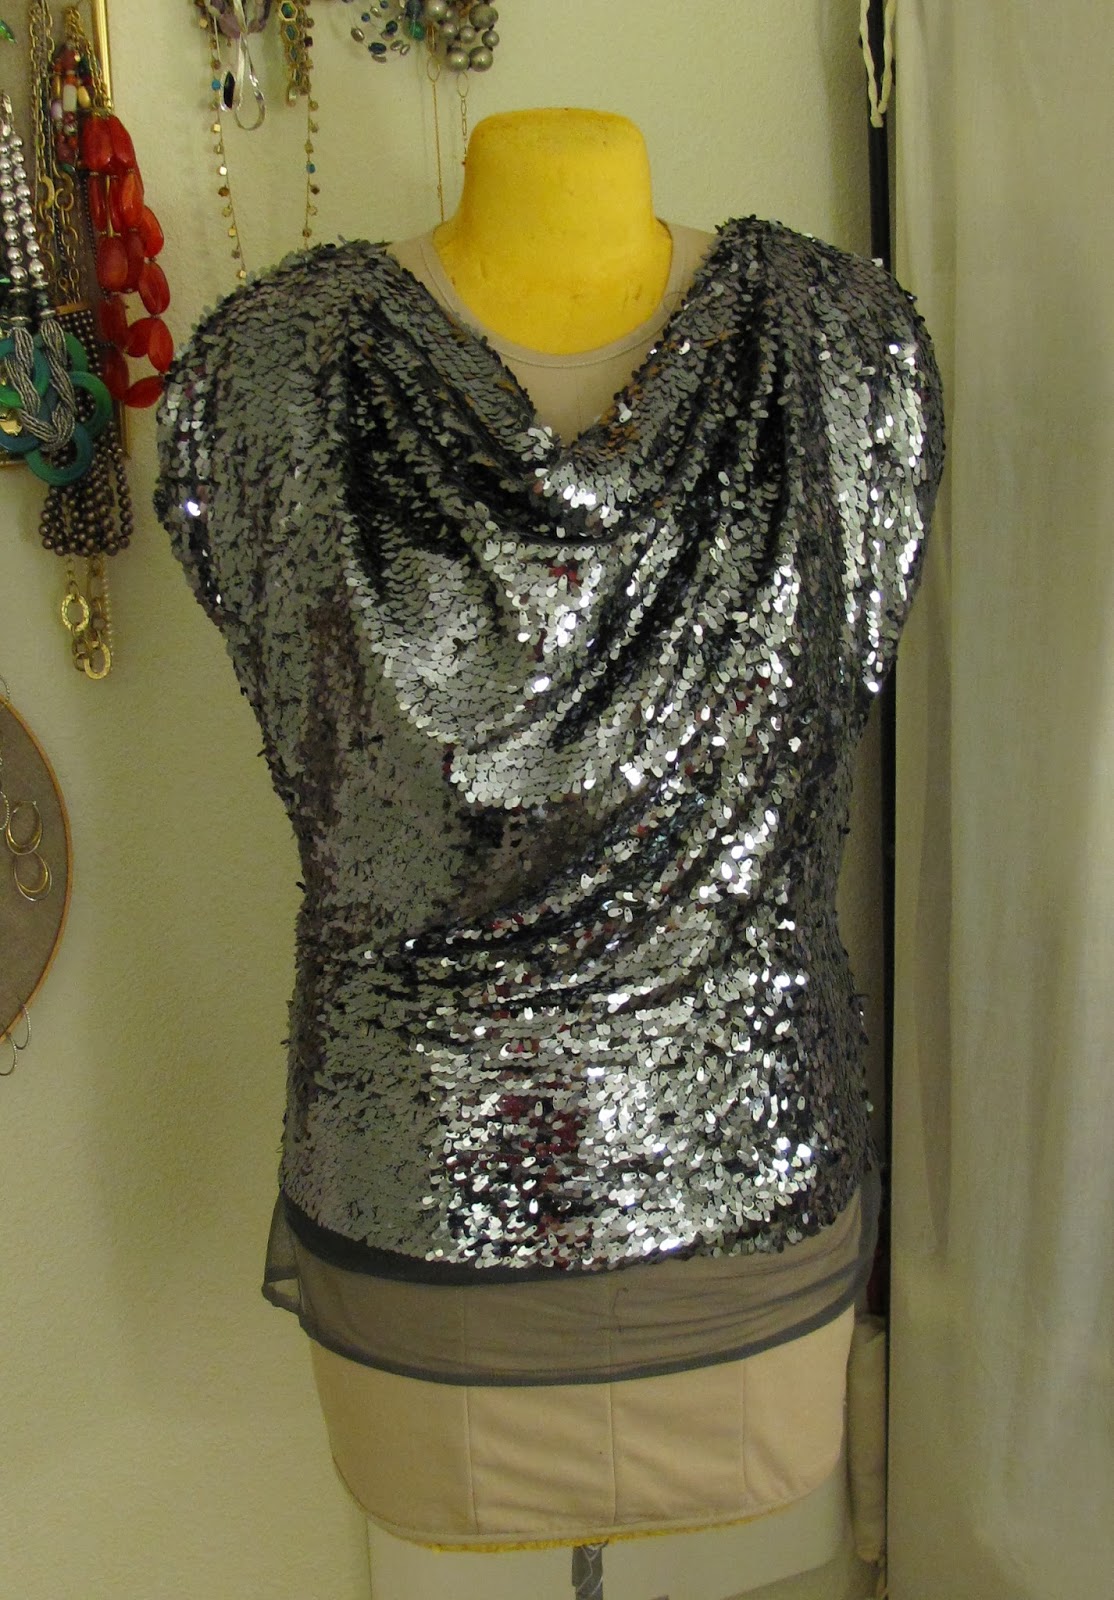
Early in the planning process, Caitlin and I discovered we had the same dress on our respective Pinterest boards.  Namely, Trashy Diva's Honey dress.


I noticed that this bore a striking resemblance to the Butterick pattern by Gertie (B5882) inspiring the reaction, "hey, I own that pattern!"  And the subsequent determination that I could make the dresses as a wedding gift for less than these dresses would otherwise cost. 
 
B5882
 
That said, I prefer the true under-bust look of the first dress to Gertie's version, which is designed more to de-emphasize the bust (dear lord, why would I want to do that?).  So I decided to draft my own version as well and figure I can let the bride (remember her?) to make the decision as to what she wanted to use.  So, last night, I busted out my cheap plastic tablecloths (best thing for first draft muslin-ing I've ever discovered) and drafted a 50's style cocktail gown that I'm actually quite proud of!

 
Pretty, no?  I've also drafted a circle skirt to go with this (you can see it in the back view), but it's ultimately less important to draft ahead of time than the bodice.  
 

Additionally, I've made some significat Ikea purchases to update the sewing corner of my bedroom and open up the space significantly. 


This new arrangement also gives me the ability to watch terrible reality television while crafting... and what could be better than that?

So to sum up: iron, patterns, weddings, and Ikea... all good things!  Discuss!


Wednesday, February 12, 2014

In lieu of the Superbowl...


Here is the best summation of my opinion of sporting events...

Thus Superbowl Sunday found me not watching commercials and eating wings, but rather at a costume workshop at RockIT CoLabs crafting it up steampunk style!


This amazing afternoon started with a tutorial in paper mache, something at which I am shockingly bad.  I somehow managed to make everything both exceedingly soggy and shapeless... it's not good folks, not good.  After that, we learned to fashion top hats from cardboard and fabric scraps.  I am pretty impressed with my quasi-Victorian efforts.


We also had a tutorial in the use of the 3-D printer.  This was actually really cool, particularly in that I think that sewing and crafting is one area where the technology as is, is  sufficient for current purposes.  While there are some 3-D printers which can work in metals or glass, the vast majority are useful only for polymers.  This restricts the use for many purposes but just think of the notions which are nothing but bits of plastic!  Think of the buttons!


So I spent a wonderful afternoon with cool people learning about some of the intersections between sewing and technology...  I can't wait for the next workshop. 


Tuesday, January 14, 2014

The Claremont Coat... Decades of Style #4009


So after my very sequin-y, sparkle-y New Year's Eve, I spent New Year's Day enjoying a nature hike along the Pacific Coast wearing my new Claremont(ish) Coat made from Decades of Style 4009
 
The fabric was a lilac wool tweed purchased by-the-piece from Fabric Mart and a lilac and patterned gray and lilac floral print silk/cotton voile for the lining.  I've always loved lighter weight jackets, and for the first time ever I live in a climate where they are a practical option.  I imagine quite a bit more tweed in my future!  Although I will give one note of caution... this fabric was lovely to work with, presses beautifully, but frays easily.  This was not a problem in the original construction, but the back panel had already began to separate from the side panels near where the panel back facings end.  I've fixed it by hand and lightly tacked the seam to the lining at the weak point which should prevent further fraying along the seam, but if I was to start over I would have finished the seam edges with the serger... 


I set out the pattern to cut just before Christmas, thus the holiday cheer in the background.  I cut the smallest size C, which pretty closely matches my measurements, but if I was to attempt it again, I'd probably go up to one of the larger "C" sizes to get a little more ease in the bust and waist and allow an easier fit over casual clothes.  In the posted pictures the coat is straining a bit over jeans and a sweater but today I wore it over a jersey wrap dress (um... and spanx) and the fit was flawless... take that as you will when determining your own size. 


I followed the directions provided with the pattern fairly closely.  I started by attaching the front yoke to the panel back.

 
I then assembled the yoke and panel facings and attached the facing to the yoke and panel back assembly.  


Next, I marked the darts on the front and sleeves with tailor's tacks and stitched all the darts.  This is my least favorite part of any project so I always do all the darts at once to get it over with!

 
I then assembled the coat side back and coat fronts... and attached the yoke and panel back with lapped seams. 


Once the body was assembled, I attached the pockets.  The pocket section attached to the coat front is made of the shell fabric, while the back pocket is cut of the lining.  This way if/when the pocket gaps open a bit, it will be less noticeable.


And then the sleeves... I actually really love these sleeves soooo much and may utilize this technique/design in future garments.  On this pattern, rather than evenly spacing gathers and doing a set in sleeve, the sleeve has 5 small, evenly spaced darts which shape the sleeve cap.  It is visually interesting and far easier to sew!  (I always have to redo set in sleeves multiple times to eliminate unwanted puckers, this is so much easier.)

 
At that point, I assembled and inserted the lining of the body, pinned and stitched the sleeve linings in and hemmed the whole kit and caboodle.  I found that my interfacing was not quite up to the task of wrangling this wool, and the front was not laying flat so I decided to top-stitch around the front and neck closure as well.  


Now as for buttons (this is always a dramatic issue for me, is it not?) I decided against the classic 2 button closure in lieu of a frog closure (for now).  As I mentioned, this coat had a little less ease than I would have initially preferred, so instead of buttonholes and buttons I decided to have the front closure meet flush at the edges with a frog closure.  It was a "make it work" moment as Tim Gunn would say.  And should my current diet succeed in reducing my girth, I can easily swap out my hand-stitched closures for proper buttonholes and buttons.  Only time will tell.


Tuesday, January 7, 2014

Ringing in 2014 with Sparkle and Shine!

 
So as we decided to spend New Year's at a comedy club (John Oliver at Cobb's Comedy Club... we got a front row table right along the stage and he was hilarious) I decided I needed a casual, yet suitably festive ensemble.  Of course, I made this determination on December 30.  So like any good sewist, I hightailed it over to my local JoAnns and picked up a few yards of a fabulous sequin mesh.  


I was then faced with the challenge of finding a sequin appropriate top.  I think the trick to working with such highly embellished fabric is to keep the design lines minimal.  So I settled on McCall's 6078 (now sadly out of print), which I have made from rayon jersey successfully several times before.  
 
 
I made a few minor alterations.  First, I decided to keep the plain mesh selvage in lieu of hemming, so I lined up the hem of the pattern along the border of the sequins when laying out my pattern pieces.  I was also uncertain as to how this much heavier and substantial fabric would drape so I played around with it on the dress form and eventually decided that the triple pleats along the shoulders and side back added too much bulk.  Instead, I made on large pleat at each point to create a cleaner cowl draped effect.  

 
I also decided that, for the sake of both transparency and comfort, I would line the top with a black rayon jersey from the stash.   This made the overall top a bit heavier than would probably be ideal, but given the amount of time we spent outside and wandering the hills of San Francisco, I was glad for the extra warmth. 


Now, this was a bit of a rush job, so on the afternoon of New Years Eve, I decided that my shoulder seams (which at that point were exposed sequins) needed to be less scratchy and sewed plain black bias tape over the trimmed seam allowance. 
 
 
Also, due to my sewing in a hurry, I didn't properly lay out all the pieces so once corner of the shoulder wound up sadly sequin-free.  In the end, it doesn't bother me too much and it's a small enough patch (about a square inch) that if I really wanted, I could add the embellishments by hand from some of the leftover scrap in about an hour.    That said, the plan was to wear this under a blazer, so I didn't much care. 


Ultimately, I think this top turned out pretty good for a 2-3 hour, last minute project.  I would certainly wear it again for other festive "going out" occasions, because really what day couldn't use a little extra sparkle?